
Review · MOUNTAIN BIKE TOURS
Geiranger: Sky to Fjord Downhill Biking Adventure
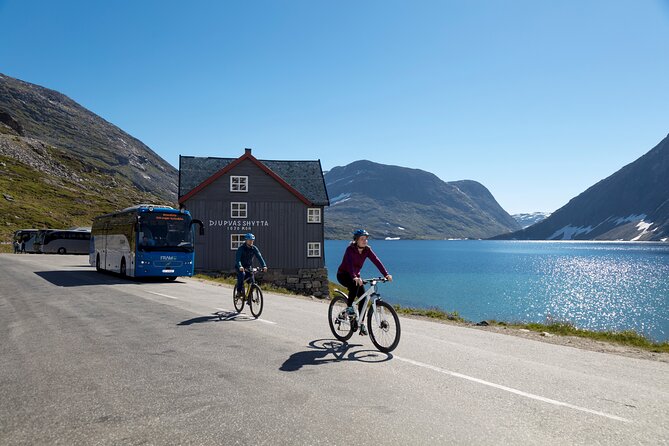
The big draw is simple: you start high beside Djupvatn Lake, then coast 16 kilometers toward Geiranger through some of Norway’s finest mountain scenery. Waterfalls, open valleys, steep peaks, and the fjord appear in quick succession. You do not need to race. The best part is stopping often and letting the road become your sightseeing route.
I like the small maximum group of six, which keeps the transfer manageable, and I like having the bike, helmet, gloves, and visibility vest supplied. The main caution is just as important: this is an unguided ride on a public road, with no dedicated bike path or shoulder in places. You need to be comfortable controlling a bike around traffic and handling the brakes carefully.
I also like the freedom to ride at your own pace. One account even describes a 67-year-old rider managing the route with ease, while another found only a short uphill section worth walking. But equipment quality has not been perfectly consistent, so inspect your bike, helmet, brakes, and seat before rolling away.
Key points to know before you book
- Start at 1,030 meters: The air-conditioned transfer takes you uphill to Djupvatn Lake before the ride begins.
- Ride 16 kilometers downhill: Most of the route is a scenic coast toward Geiranger, with one short uphill section reported along the way.
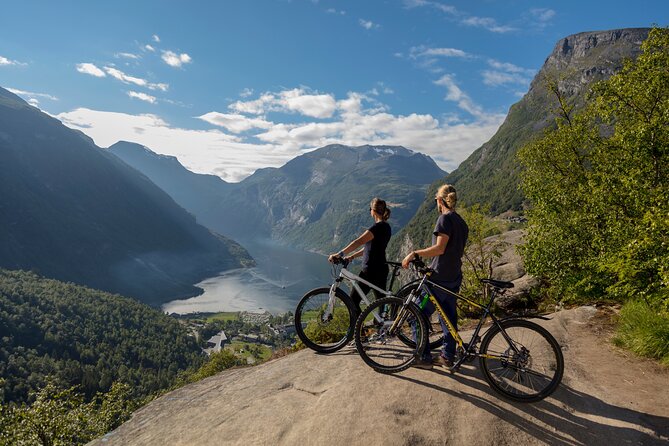
- Stop at classic viewpoints: Look for Blåfjell, Kvandals waterfall, Opplenskedalen Valley, Knuten, and Flydalsjuvet.
- Ride without a guide: Staff provide instructions and route advice, but nobody accompanies you on the road.
- Watch the traffic: The route uses a public road that may have large buses and no bike lane or shoulder.
- Check the equipment first: Bikes, helmets, gloves, and visibility vests are included, but condition and fit deserve your attention.
From Geiranger to Djupvatn Lake at 1,030 meters
You meet the operator at Geirangervegen 10 in Geiranger. The activity lasts about two and a half hours from start to finish, and an air-conditioned vehicle carries you and the equipment up to Djupvatn Lake.
That uphill transfer matters. You avoid spending your energy climbing and begin the cycling portion at altitude, where the road points mostly down toward the fjord. The drive also gives you a chance to settle in, ask questions, and hear practical advice before you are on your own.
The staff provide a bike, helmet, bicycle gloves, and visibility vest. You also receive technical and safety instructions, along with tips for enjoying the descent. Since the ride is not guided, pay close attention before setting off. Make sure you know how the brakes work, where the route goes, and what to do if you need help.
I would inspect the bike before leaving the vehicle. Check the seat height, brake response, tires, kickstand, and helmet strap. One poor equipment experience included sticky brakes, worn tires, a loose kickstand, and a damaged visibility vest. That may not reflect every outing, but it is a good reason to speak up immediately if something feels wrong.
More Mountain Bike Tours in Norway:
- Mountain Bike – Voss Forest
★ 5.0 · 35 reviews - Geiranger Fjord: Downhill Self-Guided Bike Tour
★ 4.5 · 30 reviews - Mountain Bike – Voss Storålsen
★ 5.0 · 13 reviews
The 16-kilometer ride toward Geiranger
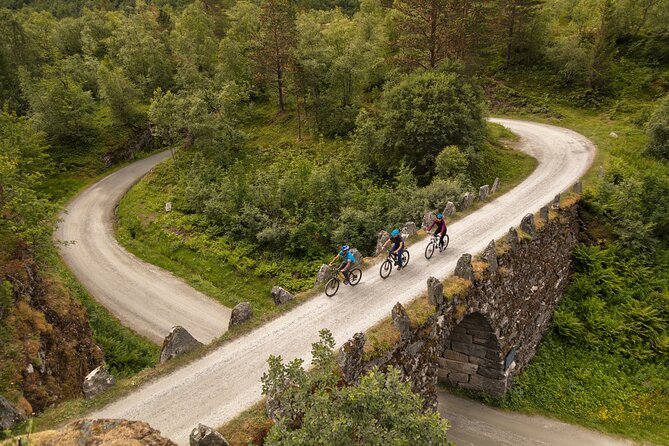
The route covers about 16 kilometers, or nearly 10 miles, from the lake down toward the village. You are not being led in a tight group, and the ride is not a race. You can stop for photos and continue when ready.
The downhill profile makes this suitable for a reasonably confident recreational cyclist, not only a serious mountain biker. One rider in their late sixties found the route easy to manage, and another person with less cycling experience found the gentle downhill pace less demanding than expected.
That said, downhill riding still requires skill. You need to control speed, scan ahead, use the brakes early, and stay alert when the road bends or traffic approaches. The road is shared with vehicles, and one account specifically warns that large buses can pass close by. There is no stated bike lane or paved shoulder along the full route.
This is the central tradeoff. The public road gives you access to the real mountain route rather than a closed cycling track, but it also means you must ride defensively. If traffic makes you nervous, ask the staff for a clear explanation of the route before you begin. If you decide not to ride, the driver may still be able to stop for photos, but that should not be treated as the main plan.
Blåfjell and Kvandals waterfall
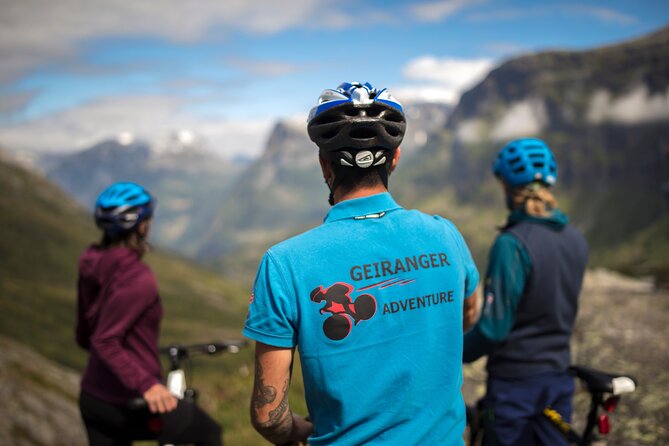
One of the first scenic stops is the viewpoint at the foot of Blåfjell mountain. This is a good place to pause before the descent gathers momentum. The mountain setting gives you a sense of the scale around Geiranger, where the road feels small beside the rock walls and open sky.
The route also passes Kvandals waterfall. Waterfalls are part of the appeal here, but their force and appearance can change with weather and season. Stop safely well away from the traffic lane, take your pictures, and leave enough time to enjoy the view rather than simply collect a quick photograph.
Because the ride is unguided, these stops work best for people who like making their own choices. You can spend a few minutes at a viewpoint, continue at once, or pause longer if conditions are good. The drawback is that you will not have a cycling guide pointing out every feature or organizing a group stop.
Opplenskedalen Valley and Knuten
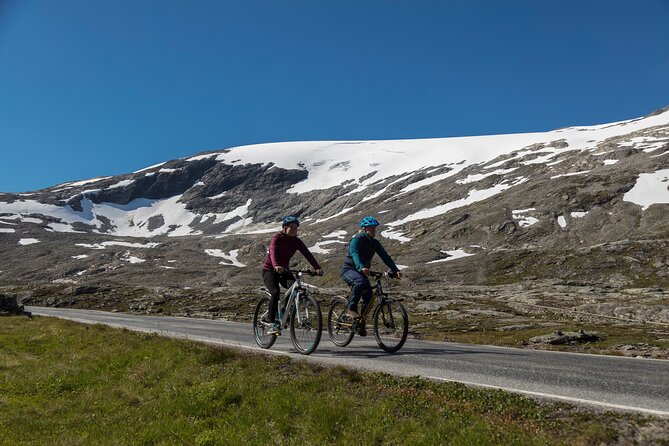
Opplenskedalen Valley brings a change of mood. After the high lake, the route opens into a broader mountain setting, with valleys, slopes, and scattered signs of life below. This is the sort of section where you will want to slow down rather than simply coast.
Knuten is another named point along the route. The itinerary does not give a detailed description of the stop, so I would treat it as a marked scenic pause rather than expect a formal attraction with facilities or interpretation.
You may find that the road is not continuously downhill. One rider reported a small uphill stretch and simply walked it. That is useful context: this is a downhill-focused ride, not a promise of gravity doing every meter of work. Bring enough energy for brief pedaling and do not feel pressured to ride a short incline if walking is safer.
More bike tours in Norway:
- Oslo: 3-Hour Highlights Bike Tour
★ 4.8 · 1,609 reviews - Oslo Highlights Bike Tour
★ 5.0 · 979 reviews - The Grand Oslo Ride: E-bike Experience
★ 4.4 · 185 reviews - The Grand Oslo Ride: E-bike Experience
★ 4.5 · 146 reviews
Flydalsjuvet, the grand finale
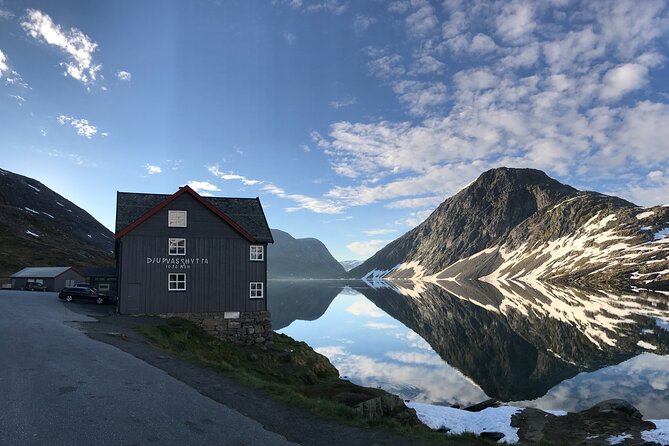
Flydalsjuvet is the best-known viewpoint on the route and the featured stop in the formal itinerary. It is one of the places that makes this excursion feel like more than a bike rental with a shuttle attached.
The viewpoint gives you a dramatic look into the Geiranger area, with the fjord and steep mountain scenery creating the kind of view that can stop a moving group in its tracks. Clear weather makes a major difference. On a sunny day, the fjord, waterfalls, flowers, villages, and mountain roads can all appear sharply defined. In poor weather, cloud and rain may hide much of the scene.
Plan to use Flydalsjuvet as a proper photo stop, but remain aware of the road and other people nearby. The route ends back at the original meeting point in Geiranger, so you are not left to arrange a separate return transfer.
What the unguided format really means
The phrase unguided is important. You receive the equipment, transfer, safety information, and route advice, but no guide rides beside you. That gives you control over the pace and makes it easy to stop whenever the view catches your eye.
I see this as a good fit for couples, friends, or small groups who can manage themselves on a bike. An unguided ride also means you can avoid the usual group rhythm: no waiting for the slowest rider at every bend, and no need to keep moving when you want one more photograph.
The downside is that help is not immediately beside you. If you have a mechanical problem, you are expected to contact the office. One account describes a concern about a flat tire and difficulty reaching the operator without mobile service. I would save the office phone number before leaving, keep the booking details available offline, and ask exactly what the procedure is if the bike fails.
The group limit of six helps, but it does not turn the activity into a guided tour. Think of it as a supported downhill ride, not a lesson or escorted cycling excursion.
Equipment, comfort, and safety checks
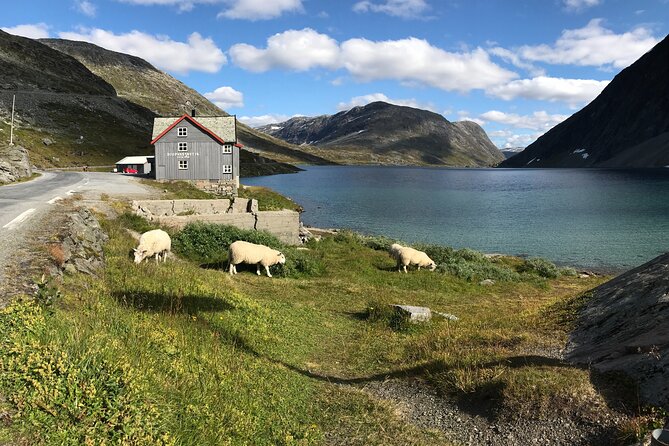
The included equipment is practical rather than luxurious: bike, helmet, gloves, and high-visibility vest. The vest is useful on a public road, particularly when buses and other vehicles share the route.
Equipment condition appears to be the most uneven part of the experience. Several accounts describe good bikes and easy handling, while one detailed complaint cites poor brakes, bald tires, difficult helmet adjustment, and a torn vest. I would not ignore that warning simply because most of the ride is downhill.
Before you begin, check these points:
- The helmet should fit snugly and the strap should adjust without trouble.
- The brakes should engage smoothly and stop the bike well before a hazard.
- The tires should have visible tread and hold their shape.
- The seat should be set for your height.
- The kickstand should stay folded while riding.
- The visibility vest should fit and remain secure.
If any item fails those checks, ask for a replacement. A spectacular view is not a reason to accept unsafe equipment.
Is $160.09 a fair price?
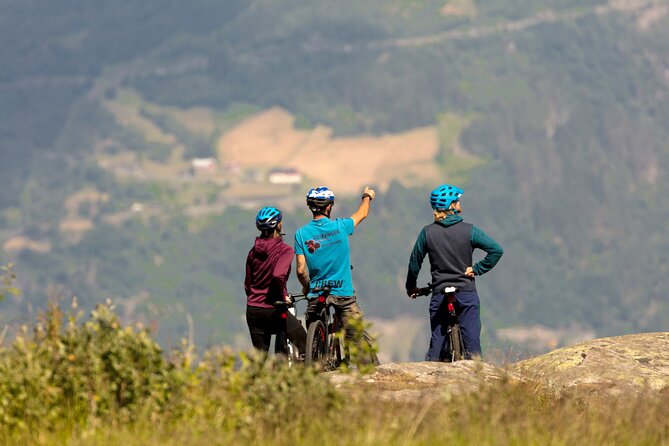
At $160.09 per person, this is not a cheap bike rental. You are paying for the vehicle transfer to 1,030 meters, the equipment, staff support, and access to a carefully selected downhill route with several major viewpoints.
The value depends on what you want from a shore or day excursion. If you want a guided lesson, a rich explanation of the region, or a long stop at every attraction, the price may feel high. The ride itself is unguided, and some of the cost pays for transport and equipment rather than personal guiding.
If you value an active way to see Geiranger, the price is easier to justify. You cover far more ground than on foot, avoid a long uphill climb, and still control your own stops. One rider called it a highlight of a cruise shore visit, while another found the price excessive because the activity felt closer to transport plus bike hire.
I would book it for the scenery and the unusual way of reaching it, not because it offers extensive guiding. If the weather is clear and the equipment is in good shape, the combination of downhill riding and fjord views can make this a memorable use of a half day.
Who will enjoy this ride most?
This activity suits you if you:
- Ride a bicycle with confidence on paved public roads.
- Like controlling your own pace.
- Are comfortable using brakes on a descent.
- Can manage a short uphill section or walk it.
- Want scenery and movement rather than a seated sightseeing trip.
- Are willing to check equipment before starting.
It is less suitable if you need a guide beside you, dislike traffic, or want a completely controlled cycling route. It may also be a poor choice in uncertain weather, since the scenery is a major part of the experience and the operator requires good conditions.
The moderate fitness requirement should be taken seriously, even though the route is mainly downhill. Cycling skill, balance, braking, and comfort around vehicles matter as much as strength.
Weather, timing, and cancellation
The experience requires good weather. That is sensible in a mountain area, where rain or cloud can reduce visibility and make the road less comfortable. If poor weather cancels the activity, you are offered another date or a full refund.
You can cancel for a full refund up to 24 hours before the start time. Changes or cancellations within 24 hours are not accepted for a refund, and the cut-off follows local time.
Since the ride is booked an average of 74 days ahead, check the forecast and your cruise schedule carefully as the date approaches. The activity lasts about two and a half hours, but you should still leave room around it for transport, weather changes, and the possibility of a late start. One account reported a departure about 20 minutes late.
Should you book the Geiranger downhill bike ride?
I would book this if your idea of sightseeing includes a little speed, a lot of scenery, and the freedom to stop when you choose. The ride from Djupvatn Lake to Geiranger gives you a memorable route through waterfalls, valleys, mountain viewpoints, and Flydalsjuvet, with no long uphill cycling effort.
I would hesitate if you are uneasy sharing a road with buses or if you expect a guide to ride with you. I would also inspect the bike carefully and confirm the emergency contact before leaving the top.
For a confident cyclist who wants an active shore excursion, this can be excellent value on a clear day. For anyone seeking a fully guided or traffic-free bike tour, choose another activity.
FAQ
Where does the bike ride start?
The ride starts at Djupvatn Lake, about 1,030 meters above sea level. You are transported there from the meeting point in Geiranger.
Where is the meeting point?
The meeting point is Geirangervegen 10, 6216 Geiranger, Norway. The activity ends back at this meeting point.
How far do I ride?
The downhill route covers 16 kilometers.
Is a guide included?
No. The ride is unguided. Staff provide technical and safety instructions before you start, but no guide accompanies you on the road.
What equipment is included?
The experience includes a bike, helmet, bicycle gloves, and a visibility vest. Transport is provided in an air-conditioned vehicle.
What viewpoints are along the route?
The route includes viewpoints near Blåfjell, Kvandals waterfall, Opplenskedalen Valley, Knuten, and Flydalsjuvet.
How fit do I need to be?
A moderate level of physical fitness is recommended. The route is mainly downhill, but one short uphill section may require some pedaling or walking.
What happens if the weather is poor?
The activity requires good weather. If it is canceled because of poor weather, you are offered a different date or a full refund. You can also cancel up to 24 hours before the start time for a full refund.
Latest bike tours added in Norway
- Premium eBike rental★ 5.0 · 18 reviews
- Mountain Bike – Voss Storålsen★ 5.0 · 13 reviews
- Mountain Bike – Voss Forest★ 5.0 · 35 reviews
- E-bike And Hiking Tour In Ålesund★ 5.0 · 47 reviews
- Oslo: Winter Highlights 3-Hour Bike Tour★ 4.9 · 46 reviews
- Olden: Guided e-bike tour★ 4.8 · 38 reviews
- Guided E-Bike Tour in Haugesund: city, vikings, Rising Tides★ 4.6 · 47 reviews
- Geiranger Fjord: Downhill Self-Guided Bike Tour★ 4.5 · 30 reviews
Mountain Bike Tours, compared.

Downhill Cycling with Volcano, Rice Terraces and Meal
Read our review →
Best Haleakala Downhill Self-Guided Bike Tour with Maui Sunriders
Read our review →
La Paz: Mountain Bike Down the World’s Most Dangerous Road
Read our review →
Downhill Bike Tour with Rice Fields, Volcano and Meal
Read our review →
Maui Haleakala Sunrise Downhill Bike Tour with Mountain Riders Rated #1
Read our review →
Browse the lists this tour appears in